Almost nobody who writes to me about bad audio has a microphone problem. They have a room problem and a placement problem, and they are shopping for a fix that cannot be bought. A USB microphone setup for creators in 2026 is good enough that the mic is rarely the weak link, which is annoying news if you were hoping to solve this with a credit card.
I have edited more than 4,000 episodes for other people. I have heard a lav clipped to a collar that rustles against a jacket every time the guest breathes. I have heard an omnidirectional desk mic pick up the ceiling fan in the next room. I have heard a laptop's built-in mic beat a condenser, because the condenser was sitting in an untreated kitchen with a tile floor and nothing on the walls.
The two mics below are the ones I hand beginners first. The workflow underneath them is the same one I use on my own voiceover sessions, and it takes about 20 minutes to set up.
Why you should trust me
I record voiceover and edit podcasts for a living out of a small treated studio in Brooklyn. I have run 30-plus microphones through the same two-room comparison, one treated, one an untreated kitchen, because almost everyone who asks me for advice records in the untreated one.
I keep spectrograms of every mic that comes through, and I care about three measurable things and one that is not measurable: noise floor, off-axis rejection, and how a mic handles a plosive, plus whether I actually want to use it every day. A microphone you are afraid to use is worse than a worse microphone you use constantly.
I do not review live-sound or instrument mics. Voice is the job, and it has been since I left the live rigging side of the business.
How I picked and how I tested
The two mics here are not the most impressive microphones I have used. They are the ones that survive the two conditions a first-time creator actually records in: a phone camera, and a laptop on a kitchen table.
Everything in this guide gets judged against the same four questions.
- Does it work with no interface? If a beginner needs a preamp, an XLR cable, and a driver install before the first take, the mic has already lost. USB has closed most of the quality gap, and the interface path is for people who know why they need it.
- What does it do with the room? Off-axis rejection and pickup pattern matter more than a frequency response graph for someone with a noisy street outside. A mic that hears everything is a mic that hears the refrigerator.
- How does it mount? A clip that sags or a stand that transmits typing will ruin more recordings than a mediocre capsule ever will. Boom arms and pop filters matter more than the next mic upgrade.
- Does the software layer behave? The new USB brands are catching up fast, but their software is hit or miss, and an app that fights you at 11 p.m. is worse than no app at all.
The room test I run everything through is deliberately unflattering: heat off, refrigerator humming, laptop fan audible, a radiator that ticks. If a mic only works in a treated room, it does not belong in a first kit.
The two mics I would start with
Two mics, two jobs. One is for the person who shoots on a phone. One is for the person who sits at a desk. If you do both, you will eventually own both, and the combined spend is still less than what a single mid-tier XLR mic and interface costs.
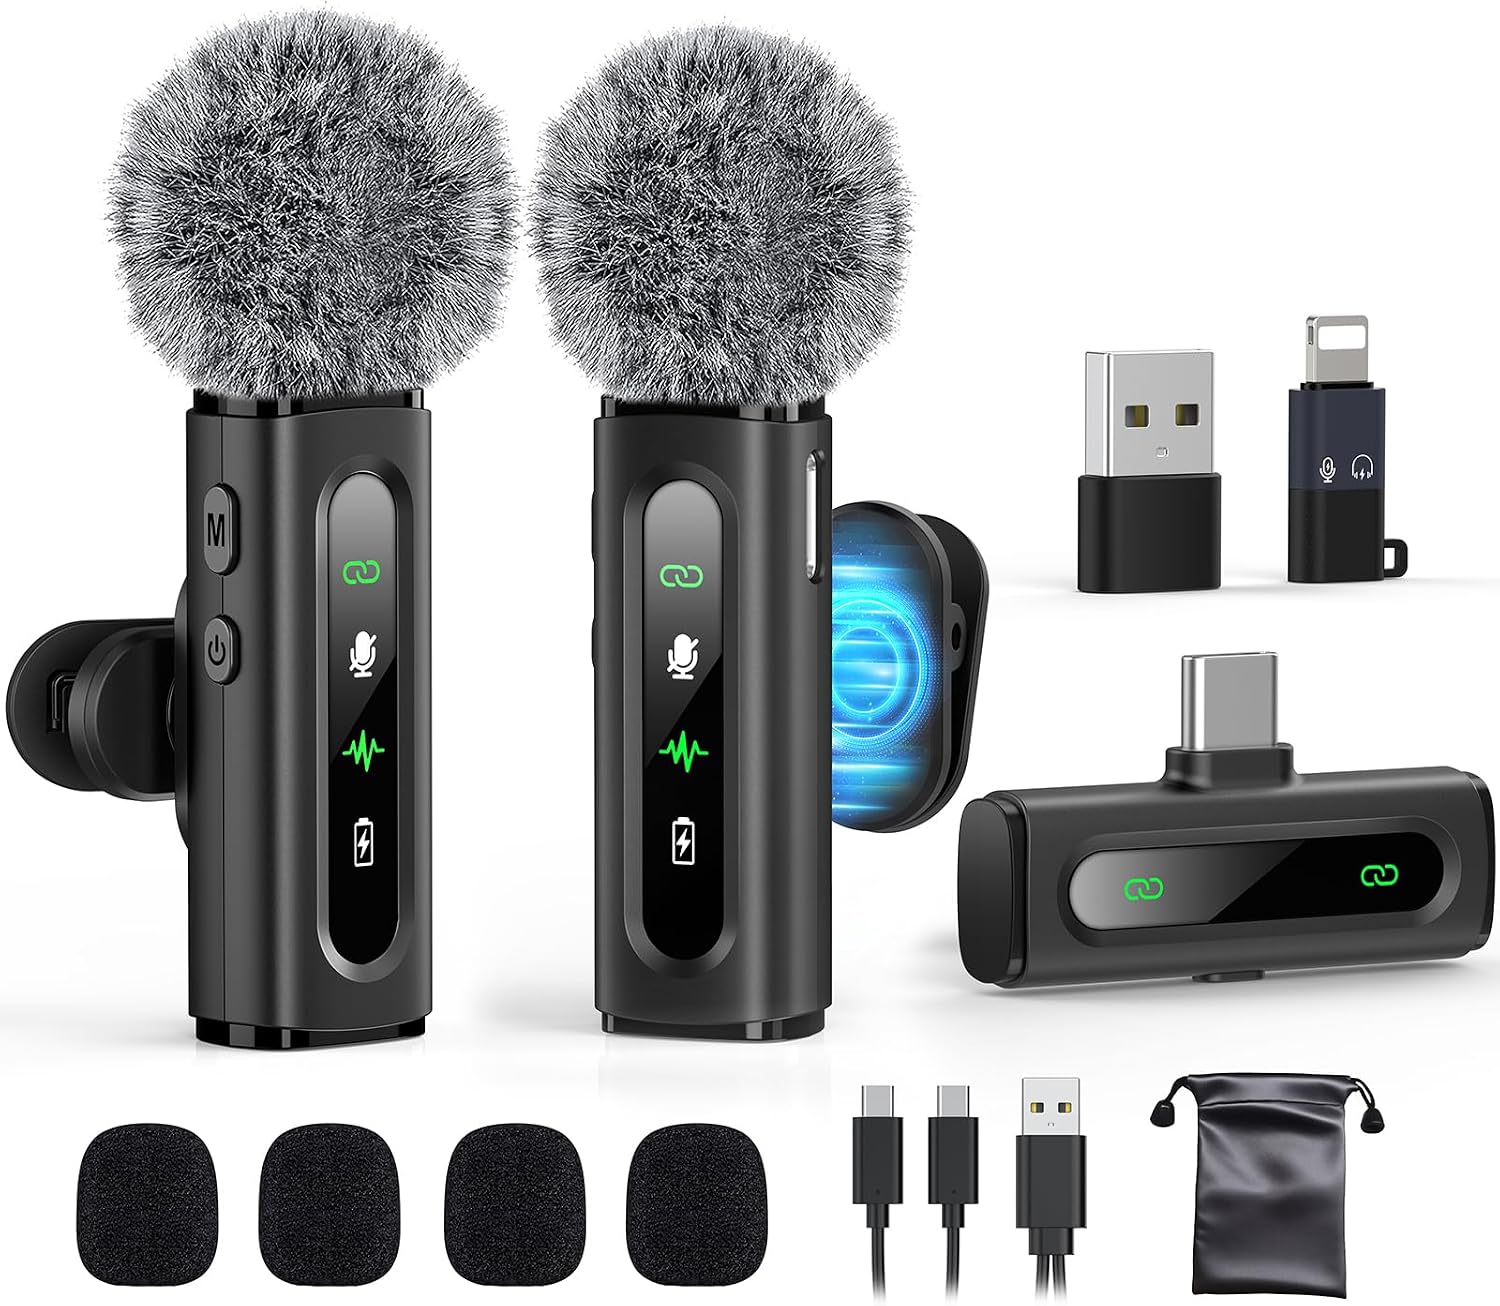
Phone-first pick: USB C Lavalier Microphone Wireless Mini Mic for Type-C Android Phone/Tablet/PC Video Recording Clip-on Mics with Rotatable Clip&Denoise Recording, Ideal for Vlog Tiktok Youtube Podcast Content Creator
 Visit on Amazon →
If you shoot talking-head video on a phone, this is the upgrade that removes the biggest variable in your audio: distance. The capsule sits on a clip at your collar instead of three feet away on a table, and the wireless link means no cable tugging on the phone while you move. It connects over Type-C, so it works with a phone, a tablet, or a laptop without an adapter in the chain, and the rotatable clip lets you aim the capsule where you want it instead of where the shirt decides.
The denoise setting is the one feature to test deliberately. It is processing, not magic, and processing on a close voice can shave the edge off consonants and make you sound like a phone call. Record 20 seconds with it on and 20 with it off, listen on headphones, and pick the take that sounds like you. In a quiet room, off usually wins.
The real caveats of any lav are physical. Clothing rustle, a clip that sits too low, and a capsule rubbing against a jacket zipper will all beat anything the mic does well. Clip it high on the chest, keep it off the fabric edge, and give the wire a small strain-relief loop.
Flaws but not dealbreakers: It is a wireless device, which means a battery to charge and a 2.4 GHz band shared with your router and every other device in the apartment. Charge it before you record, and keep the receiver end near the phone.
Anyone who films themselves on a phone, walks while talking, or interviews people who cannot sit at a desk will get more out of this than out of any desk mic.
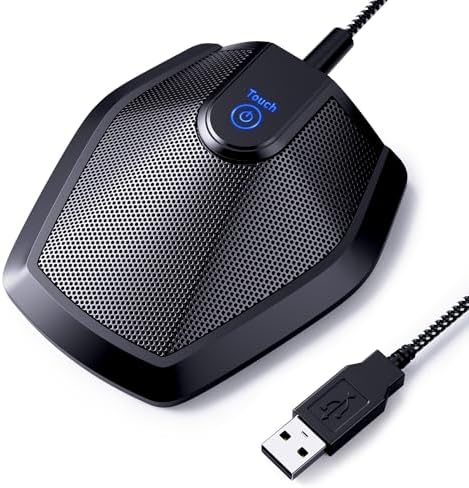
Desk pick: TONOR Conference USB Microphone, Omnidirectional Condenser PC Mic G11
 Visit on Amazon →
For the person who records at a desk, on a laptop, in one room, this is the simplest path to usable audio: USB in, no interface, no driver dance. It is an omnidirectional condenser, which means it hears in a circle rather than a cone. That is a feature at a conference table where four people are talking and a liability in a bare bedroom, because everything in the room ends up on the recording.
The fix is placement, not settings. Bring it closer than looks polite, and put something soft between the mic and the keyboard. Omni capsules reward proximity. If you can put it on a boom arm or a short stand and get it off the desk surface, you remove the typing thumps and the desk resonance in one move. That single change is worth more than any software setting.
Because it is a condenser, it is more sensitive than a dynamic mic, which means your room tone shows up. Turn off the HVAC, close the window, and put a rug or a blanket behind you if the wall is bare. If you are recording in a tiled kitchen with a refrigerator running, no mic in this price class will save you.
Flaws but not dealbreakers: The omni pattern means it will pick up a ceiling fan, a street, and a roommate. That is the trade for the easy setup and the natural sound at close range.
Anyone who records solo at a desk, or who needs one mic to cover a small group around a table, should start here.
The actual setup workflow
Now the part you came for. None of this requires an interface, a DAW course, or a treated room. It requires 20 minutes and the discipline to do the boring steps first.
Step one: choose the mic by job, not by spec sheet. Phone video and movement, use the lav. Desk recording and one fixed seat, use the USB desk mic. Buying a condenser because the spec sheet bragged about frequency response nobody can hear is how people end up with a mic they are afraid to use.
Step two: fix the room before you touch the gain. The room is the microphone. Turn off the HVAC. Deal with the refrigerator hum by recording in the far room or unplugging what you can. Put something soft behind the mic and behind you. A blanket, a rug, a couch cushion, a closet full of clothes. This costs nothing and it changes more than a mic upgrade.
Step three: place the mic. For the lav, clip it high on the chest, six to eight inches below the chin, off to one side of the sternum so plosives miss the capsule. For the desk mic, get it close and slightly off-axis to your mouth, angled so you speak across it rather than into it, and as far from the keyboard as the arm allows.
Step four: set gain and leave it alone. Speak at the volume you plan to use for the whole session and set the input so your loudest moments peak comfortably below the ceiling, roughly minus 12 to minus 6 dBFS. If you are riding the gain knob between sentences, you set it too hot. This is gain staging, and it is the step people skip before blaming the mic.
Step five: record 30 seconds of room tone. Say nothing. Do not move. This is the most valuable 30 seconds of the session, because it gives your editing software a clean sample of the room to subtract from everything else. It is also the fastest way to hear how bad your room actually is.
Step six: monitor on headphones, not speakers. Speakers feed back into the mic and into your room. Closed-back headphones let you hear plosives, rustle, and hum while you can still fix them.
Step seven: work on technique. Proximity effect is your friend: get closer and the low end fills in while the room drops away. Back off for anything loud. Keep a pop filter, or at least an off-axis angle, between your mouth and the capsule. Sit up. Read standing if you can. The performance is half the recording.
Step eight: edit gently. High-pass the voice around 80 to 100 Hz to remove rumble, apply noise reduction in small amounts, de-ess only where it hurts, and stop. Over-processed voice sounds worse than a little room tone.
The competition and why it lost
The XLR mic plus interface path is a great path for someone who knows why they need it. For a first kit, it is three purchases and a driver install standing between you and your first recording, and it buys you almost nothing in an untreated room.
The large-diaphragm condenser in a bare bedroom is the most common mistake I see. It is the wrong tool for a reflective room with a noisy street outside. Condensers are for treated rooms. Dynamics are for real life.
The laptop's built-in mic is not a joke, it is a benchmark. It is the mic most creators actually start on, and it fails on distance, not on quality. Move a real mic to where your mouth is and the difference is immediate.
The gaming headset boom is the other common starting point. It works, and it will keep working until you want to sound like a person instead of a call. There is nothing wrong with it as a backup.
None of these are bad products. They are the wrong first purchase for the room you actually record in.
What this all costs
Check current Amazon price on both mics before you decide. They sit at the affordable end of the market, and the difference between them is not quality, it is the job. The lav costs more than the desk mic and does something the desk mic cannot do, which is follow you around. The desk mic is the simpler purchase and the better first recording.
The rest of the budget is not the mic. It is a boom arm or a stand, a pop filter, and whatever soft things you already own to break up the room. A microphone you are afraid to use is worse than a worse microphone you use every day, and both of these are affordable enough to use every day without thinking about it.
That is the whole job. Your room is doing most of the damage, and 20 minutes of setup is what makes the microphone stop being the excuse.