Most creators blame the microphone. The microphone is rarely the problem. You record in a bedroom with a window over a Brooklyn street, you set the phone on the desk next to the laptop, and you wonder why the take sounds thin and far away. Nine times out of ten the culprit is the room and the placement, not the capsule.
So here is the honest version of the USB dynamic mic vs lav mic decision, from someone who edits other people's audio for a living and hears both choices fail in the same predictable ways.
The short version: if you sit at a desk and talk into one fixed spot, a USB dynamic mic on an arm beats almost everything near its price. If you move around, shoot outdoors, or record on a phone, a wireless lav mic clipped to your collar is the better tool. Both are in this guide. Neither requires an audio interface.
Why you should trust me
I'm Jonas. I run a small studio in Brooklyn where I record voiceover and edit podcasts for other people, and I have edited north of 4,000 episodes. That means I have heard every mistake a creator can make with a microphone, usually twice, usually in the same order.
I have put more than 30 mics through the same two tests: a treated home studio and an untreated kitchen, because most podcasters and creators record in untreated kitchens and bedrooms. I keep spectrograms of each one, I keep room tone recordings from each space, and I judge a mic on what survives an edit, not on what sounds impressive for 20 seconds in a demo.
My bias is simple. The room is the microphone. I can make a modest mic sound better than an expensive one in a bad room, and worse in a good one. Off-axis rejection matters more than frequency response when there is a truck idling outside.
How I picked and how I tested
This is a workflow, not a spec sheet ranking. The two mics below are the two entry paths I recommend most often to new creators, and I chose them for how they behave in real rooms rather than how they look in a marketing photo.
For the phone path, I looked at whether the mic clips on and stays put, whether it pairs without an app fight, whether it rejects the room, and whether the recording survives a real edit with compression and noise reduction applied.
For the desk path, I looked at whether the mic needs an interface (it should not, for a first setup), how much keyboard and desk noise it picks up, how it handles plosives, and whether the included accessories are actually usable or just filler in the box.
Then I ran both through the same sequence: record a paragraph at working distance, record 30 seconds of room tone, run the same high-pass and compression chain, and listen for what the room added. The mic that sounds best in isolation is usually not the one that sounds best after an edit.
The gear you need before you press record
Two paths, two tools. Pick the one that matches how you actually work, then follow the workflow below.
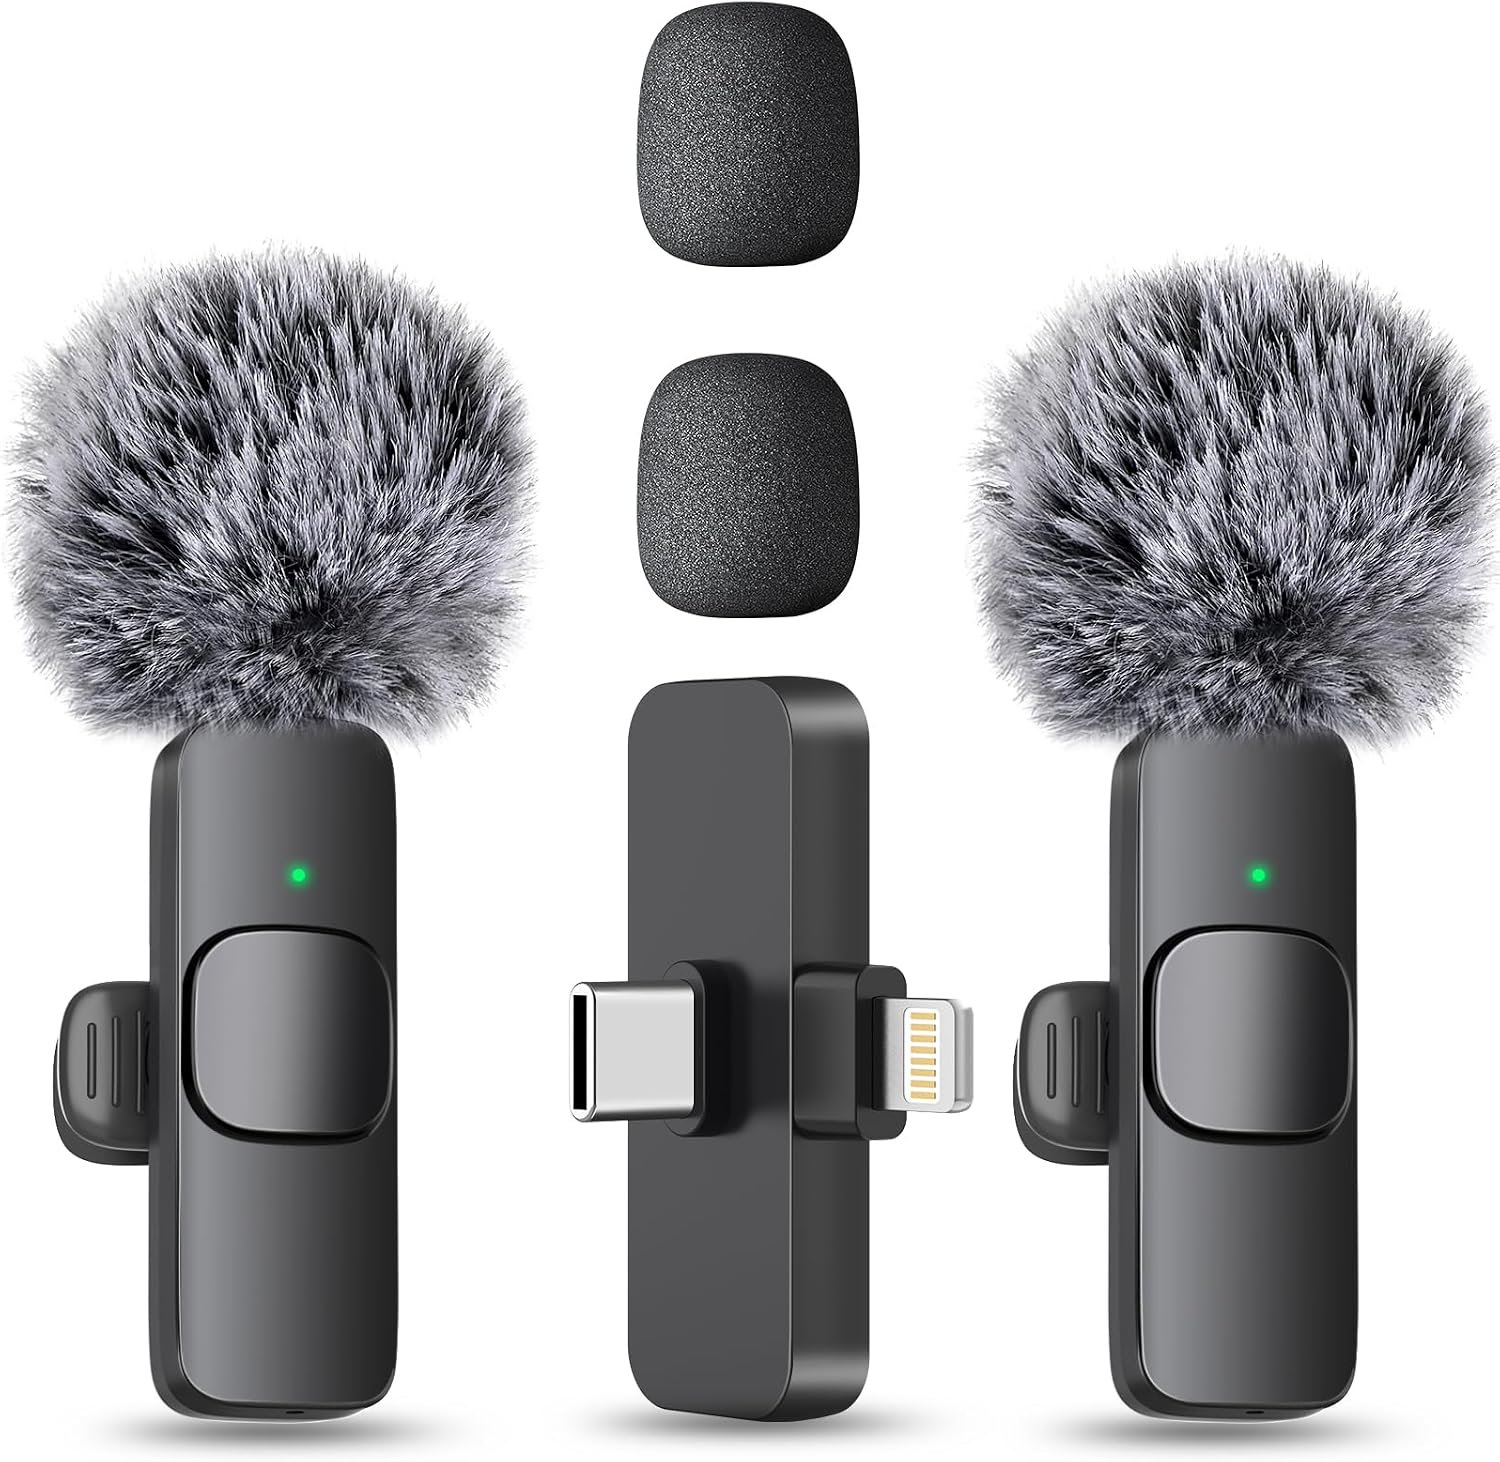
The phone-first pick: MAYBESTA Wireless Mini Microphone for iPhone, Android Phone - 2 Pack Lavalier Lapel Mic
 Visit on Amazon →
This is the path I hand to people who shoot on a phone: interviews, walking segments, TikTok, YouTube, anything where the camera moves and the subject does too. The two pack matters because the moment you own one lav, you need a second one for a guest, and buying them in pairs is cheaper than buying them twice. Check current Amazon price.
The reason a lav works is distance. A mic two inches from a collar hears mostly voice and very little room, which is why a tiny lav can beat a much more expensive mic sitting across the room. Clip it below the collar, run the cable under the shirt or clip the pack to a waistband, and the room tone problem mostly disappears.
Flaws but not dealbreakers: Wireless means batteries and pairing. Test the connection before every session, not after, and keep the receiver charged. A lav also picks up clothing rustle if you clip it to a loose collar, so secure it against the fabric and do a 10 second test take.
Anyone who shoots on a phone, moves around, or records two people at once should start here.
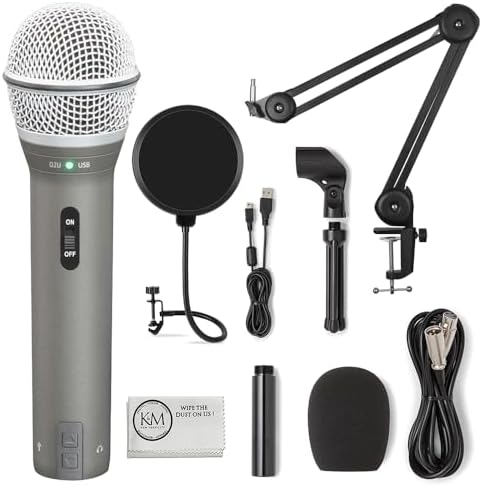
The desk pick: SAMSON Technologies Q2U USB/XLR Dynamic Microphone Recording and Podcasting Pack
 Visit on Amazon →
This is the desk path done properly: a dynamic capsule, USB out for now, XLR out for later if you ever buy an interface, and a bundle that includes the pop filter and boom arm you would otherwise buy separately. Check current Amazon price.
Dynamic is the key word. A dynamic mic rejects more of the room than a condenser, which is exactly what you want in a bedroom with a window unit, a hallway, or a neighbor who watches television loudly. The USB side means no interface, no preamp, and no cable shopping on day one. The XLR side means the mic does not become landfill the day you decide you want a mixer.
Flaws but not dealbreakers: A dynamic mic needs more gain than a condenser, so set your input level deliberately and talk close, four to six inches, angled slightly off-axis so you are not blasting plosives straight into the grille. The included arm does the job; if it sags on a heavy desk, tighten the joints and re-check it monthly.
Anyone who records sitting down, in one fixed spot, and wants a setup that survives the first upgrade should start here.
The actual recording workflow
The mic is maybe 30 percent of the result. This is the other 70, and it works with either path above.
Step one: fix the room first. Close the door. Turn off the fan, the air conditioner, and the HVAC if you can. Move away from the refrigerator wall. Soften the space with what you already own: a rug, curtains, a couch, a bookshelf, laundry. Hard parallel walls and bare floors are what make a voice sound like it was recorded in a bathroom. You do not need foam panels to get most of the way there. You need less hard surface and less noise.
Step two: place the mic correctly. With the lav, clip it below the collar, not under the chin, and give it a straight run of cable with a little slack so a head turn does not tug it. With the desk mic, put it four to six inches from your mouth, angled 30 to 45 degrees off to one side of your nose. That angle uses off-axis rejection to soften plosives and keeps your breath out of the capsule.
Step three: set gain before you record a single word. Speak the loudest sentence of your script, watch the meter, and set the input so peaks land comfortably below the ceiling, around -12 to -6 dBFS. If you record too hot, you cannot fix clipping. If you record too quiet, you can raise it later, but you raise the noise floor with it. The goal is a healthy level with headroom.
Step four: deal with plosives. P sounds and B sounds push a burst of air at the capsule. A pop filter in front of a desk mic fixes most of it, and the bundle above includes one. With a lav, angle the capsule slightly off the line of your breath and clip it a little lower. Speak a test sentence with plenty of P sounds before the real take.
Step five: kill the desk noise. A mic sitting on the same surface as your keyboard and mouse is a microphone for your typing. Put the desk mic on a boom arm so the only thing it touches is air, or at minimum put something soft under the stand. This is the single most common reason a decent mic sounds cheap in a home recording.
Step six: monitor while you record. Wear headphones. Not to hear yourself sounding impressive, but to catch the chair squeak, the phone buzz, the dog, and the fan you forgot to turn off. If you cannot monitor from the mic itself, monitor from the phone or the computer, but monitor.
Step seven: record 30 seconds of room tone. Sit still, say nothing, record the room. That file is what a noise reduction tool uses as a reference, and having it means you can lower the noise floor without the watery artifacts that come from guessing.
Step eight: process lightly. High-pass filter around 80 to 100 Hz to remove rumble and desk thumps. One stage of gentle compression to even out the level. Noise reduction used sparingly, because over-denoising makes a voice sound like it is underwater. Then leave it alone. If the take still sounds bad after that, the problem is the room or the placement, and re-recording will not fix it.
The competition and why it lost
The obvious alternatives to the two paths above are all real tools, and all wrong for a first setup.
A large diaphragm condenser microphone is the classic studio choice and the worst first mic for most creators. Condensers are sensitive and detailed, which is a compliment in a treated room and a problem in a bedroom. They hear the room, the fan, the street, and the reflection off your monitor. If your space is not treated, a condenser makes the room the loudest thing in the recording.
An XLR mic plus an audio interface is the right answer for someone who already knows why they need separate gain control, multiple inputs, and a mixer. It is the wrong answer for a first purchase, because the interface is a second purchase, a second cable, and a second set of things to troubleshoot when the recording comes back silent. The Q2U bundle exists precisely to skip that step while keeping the door open.
A wireless system with a separate bodypack and receiver is what you graduate to when you need range, multiple channels, and professional reliability. For a single creator shooting on a phone, the clip-on two pack covers the same ground without the receiver bag.
And the built-in microphone on your phone or laptop is the real competition, in the sense that it is what you are using right now. It is also the reason your last video sounded distant. The phone mic is tuned for speakerphone calls, not for a voice that has to survive compression and sit on top of music. Getting a real mic within a few inches of your mouth is the entire upgrade.
What this all costs
The phone-first path is the cheaper entry point, and it is cheaper in a way that matters: it is one purchase with nothing else required. No interface, no cables to match, no stand to buy. Check current Amazon price and compare it to the cost of a single re-recorded session, which is how I usually settle the question for people.
The desk path costs more up front, but it bundles the accessories that would otherwise be separate line items: the pop filter, the boom arm, and the cloth. If you price those separately, the gap between the two paths narrows. Check current Amazon price before you decide, because the bundle math changes with sales.
Neither path requires acoustic treatment, but both improve with it, and treatment is free if you use what you already have. A rug, a curtain, and a closed door cost nothing and do more for your audio than the next mic up the ladder.
The upgrade treadmill is the expensive part. People buy a condenser, then an interface, then a better interface, then a treated room, and they end up with the same voice in the same room. Buy the tool that matches how you record, learn the eight steps above until they are automatic, and spend your next audio dollar on the room instead of the mic.
That is the whole job. Get the mic close, get the room quiet, set the gain once, and record. Your audience will never compliment your microphone. They will just stop noticing it, which is the point.