Most creator audio problems are distance problems. Your phone's built-in mic is fine hardware, but it sits about 18 inches from your mouth and points at whatever the phone is facing, which is usually the ceiling or the wall behind you. A wireless lavalier microphone moves the capsule to within a few inches of your voice, and that single change does more for intelligibility than any processing plugin you can buy.
I edit other people's podcasts and voiceover for a living, so I hear the result of that distance every day: room tone that swells when the guest leans back, plosives that clip the input, a refrigerator that only shows up in the quiet parts. The fix is almost never a more expensive microphone. It is placement, gain, and a thirty-second test.
Here is the workflow I use for phone-based video and interviews, plus the two clip-on systems I would start with.
Why you should trust me
I have edited more than 4,000 episodes for other people. That number is the whole credential. When you have heard that many takes, you stop being impressed by gear and start being impressed by recordings that survive an edit. I run a small studio in Brooklyn where I record voiceover and teach podcasters how to sound good, and I keep spectrograms of the mics that pass through it.
My bias is simple. The room is the microphone. Most people need a close mic and softer surfaces, not a more expensive capsule. I do not make money when you upgrade, and I would rather you spend your budget on a rug and a clip-on lav than on an interface you do not need yet.
How I picked these two
I limited this to two systems on purpose, because the clip-on category gets confusing fast and most of the confusion is spec-sheet noise nobody can hear.
The criteria: it has to connect to a phone without a chain of adapters, it has to be light enough to clip to a shirt without dragging the collar, the battery has to survive a normal shoot day, and it has to give you some way to deal with a room you cannot treat. One entry option covers solo work. One step-up option covers two people and gives you a dedicated mobile receiver.
I did not rank these on frequency response curves. Nobody watching your video can hear a small lift at 8 kHz. They can hear the fan.
The room is the microphone, even with a lav
A clip-on mic does not make your room disappear. It makes your voice louder than your room, which is the practical version of the same thing.
Two things happen when you move a mic from 18 inches away to 5 inches away. First, your voice arrives at the capsule with far more energy, so you can turn the input gain down. Second, the room reflections and the fridge and the street arrive at the capsule with roughly the energy they always had, which means they get quieter relative to your voice as the gain comes down. That is the entire trick, and it is why a cheap clip-on beats an expensive condenser sitting on a desk across the room.
The rest is off-axis rejection and gain staging. Keep the capsule pointed at your mouth, not at the side of your neck. Keep the gain low enough that a loud laugh does not clip. And keep the phone in airplane mode so a notification does not show up in the middle of your best take.
Two clip-on options that cover the range
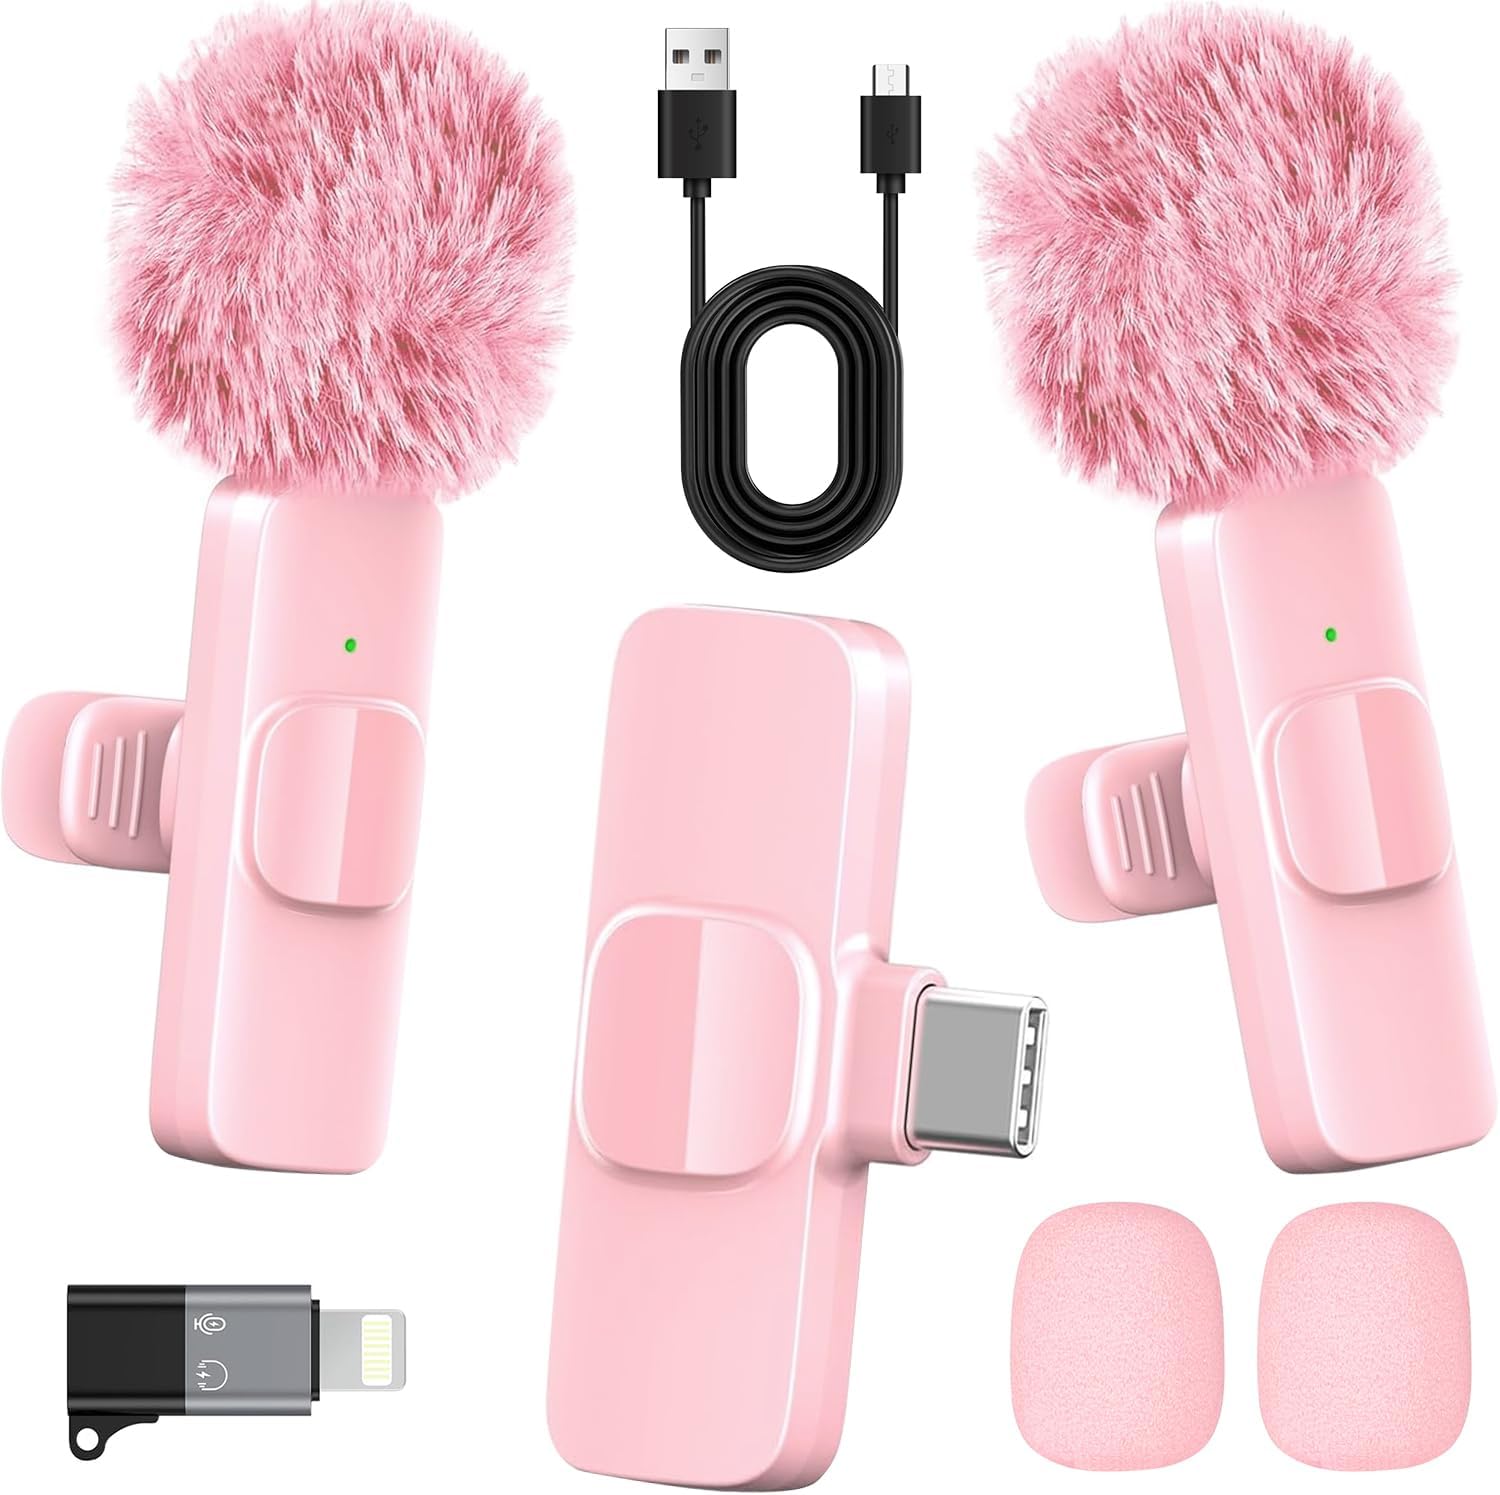
Budget pick: Pink Wireless Lavalier Microphone for iPhone & Android - Mini Clip-On Mic with Noise Cancellation, 65ft Range, 8H Battery, USB-C/Lightning - for TikTok, YouTube, Podcast, Live Streaming
 Visit on Amazon →
This is the entry point, and the spec list tells you exactly who it is for. USB-C and Lightning in the same package means no adapter chain, so it works with the phone in your pocket today. The 65-foot range means you can leave the phone on a tripod and step back to a framing position without a cable tugging at your collar. The 8-hour battery covers a full day of short takes, which is how most phone video actually gets shot.
The noise cancellation is the part to understand before you rely on it. Onboard noise reduction is a blunt instrument. It can rescue a take in a kitchen with a running dishwasher, and it can also make a quiet room sound slightly processed. Record one pass with it off and one with it on, then pick in the edit. That habit costs you twenty seconds and saves you from a take that sounds like it went through a phone call.
The single transmitter is the real limitation. This is a solo system, or a one-interviewer setup where the guest gets the mic and you stay off-camera. Pink is the finish, and if that matters to your brand, great. If not, ignore it.
Flaws but not dealbreakers: One transmitter means one voice. For two people you are passing a mic back and forth, and that never sounds as good as two people wearing two mics.
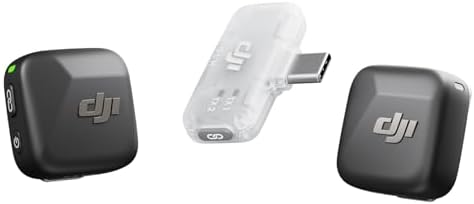
Upgrade pick: DJI Mic Mini (2 TX + 1 Mobile RX), Ultralight, Active Noise Cancelling
 Visit on Amazon →
The step-up buys you two things: a second transmitter and a receiver that lives on the phone instead of relying on the phone to do the pairing work.
Two transmitters means two people can both wear a mic. If you record interviews, that is the whole ballgame. Passing one lav back and forth across a table is the fastest way to get a recording where one person is loud and close and the other sounds like they are calling from a hallway. Two transmitters also means you can clip one to yourself and one to a guest without touching anything mid-conversation.
Ultralight matters more than the spec sheet suggests. A heavy clip drags a shirt collar, and a dragged collar is rustle on every head turn. Light transmitters stay where you put them.
Active noise cancelling is a processing stage, not magic. Use it as a fallback in a genuinely loud room, and record a clean pass when you can so you have something to compare against. If the room is quiet, the processing is not buying you anything.
Flaws but not dealbreakers: If you shoot solo, you are paying for a transmitter you will not use. Buy this when you know you will have a second person on camera.
The setup workflow, step by step
Step one: kill the noise you can control. Turn off the HVAC, the ceiling fan, the dishwasher, and anything with a compressor. Silence your phone notifications and put it in airplane mode. Unplug the charger from the wall if it hums. This takes two minutes and it is worth more than every plugin in your editing software.
Step two: clip the mic in the right place. Aim for 5 to 7 inches below the chin, off to one side of the sternum, not dead center. Clip it to a placket, a collar, or a waistband that does not move. Never clip it to a loose t-shirt hem, because every breath will move the fabric and the capsule will hear it.
Step three: manage the cable and the fabric. Loop any slack and tape or pin it so the cable does not pull on the capsule. If your shirt has a zipper, a necklace, or a lanyard, move it or remove it. Metal tapping against a clip is one of the most common sounds in amateur footage.
Step four: set the gain low. Watch the meter while you talk at your normal volume and laugh once, loudly. You want peaks with headroom, not peaks touching the top of the scale. A quiet recording can be raised in the edit. A clipped one cannot be fixed.
Step five: run the plosive test. Say a sentence with hard P and B sounds, then a sentence with S and T sounds. Listen on headphones, not on the phone speaker. If you hear a pop, move the capsule a half inch to the side or angle it slightly off the center line of your mouth.
Step six: record room tone. Thirty seconds of silence with everyone in position and nobody talking. Editors use it to smooth cuts. If you are editing your own video, you will be glad you have it when you need to cover a cough.
Step seven: decide on noise cancellation deliberately. Record a pass with it off. Then record one with it on. Compare on headphones. Pick the one that sounds less processed, not the one that sounds quieter.
Step eight: record a safety take with the phone mic. Ten seconds of the same sentence on the built-in mic. If the wireless system fails in the middle of a take, you have something to match tone against.
Step nine: back up before you leave the room. Copy the files off the phone. Phones get dropped, and a lost take is the only audio problem nobody can fix.
What ruins a clip-on take
Rustle comes first. It is almost always fabric, and it is almost always solved by moving the clip to a more stable piece of clothing.
Wind is second. Even indoors, a fan or an open window puts low-frequency rumble on a capsule. Move the mic, move yourself, or move the fan.
Third is the room tone mismatch. If you record half your video in the kitchen and half in the bedroom, the two halves will not cut together. Pick a room and stay in it, or record room tone in both and let your editor do the work.
Fourth is level. People push gain because they think louder sounds better. It does not. It sounds closer to clipping, which is a sound nobody enjoys.
Fifth is the handoff. If two people share one mic, the levels will swing every time it changes hands. This is the strongest argument for the two-transmitter system above.
What this costs
The entry system is the cheapest way into clip-on audio, and the step-up costs more because there are two transmitters and a mobile receiver in the box. Check current Amazon price on both and compare that number to the cost of a re-record, because a reshoot means another location day, another guest, and another edit pass.
The honest math is not about the mic. It is about how many takes you have to do before one is usable. A close mic with a clean gain stage usually gets you there on the first one.
The caveat I always give
A clip-on mic does not fix a hard room. If your walls are bare, your floor is tile, and your ceiling is drywall, the reflections are still there, they are just quieter relative to your voice. That is usually enough for phone video, and it is not enough for a serious voiceover.
If you want to go further, spend the next money on soft surfaces: a rug, a bookshelf, curtains, a blanket behind the camera. Then, if you still need it, a treated corner and a dynamic mic. Not the other way around.
Start with distance. Everything else in audio gets easier once the mic is close to the mouth.