A podcast mic setup in a small untreated room is a different problem than the one gear videos solve. Those videos assume a treated studio, a $400 condenser, and a quiet street. Most of us have a laptop fan, a radiator, a neighbor with a leaf blower, and a desk that transmits every keystroke straight into the recording.
The room is the microphone. I can make a cheap mic sound better than an expensive one in a bad room, and I can make an expensive mic sound worse in a good one if I ignore placement and gain staging. This guide is about building a podcast mic setup that survives a real edit, not a showroom demo.
Why you should trust me
I am Jonas. I edit podcasts for a living, more than 4,000 episodes for other people, which means I have heard every microphone mistake a host can make. I run a small studio in Brooklyn where I record voiceover and teach podcasters how to sound good. I have tested more than 30 mics in my treated home studio and in my untreated kitchen, because that is where most people actually record.
I keep spectrograms of every mic I test. I care about what happens after compression and noise reduction, not what the box claims. My bias is simple: most people need a $100 dynamic mic and some acoustic treatment, not a $400 condenser. USB mics have closed most of the quality gap, and the interface plus XLR path is for people who know why they need it.
How I picked and how I tested
I did not rank these mics by frequency response charts. I ranked them by how they behave in a real room. The questions I ask are practical: How much of the room does the mic pick up? How much gain does it need? Does it survive a noisy edit? Does it make the person speaking want to record again tomorrow?
I tested both mics in my untreated kitchen, which has a refrigerator hum, a tile floor, and a window facing the street. I recorded the same script at the same distance, then listened for room ring, plosives, and keyboard noise. I also checked how each mic handled gain staging with a normal speaking voice, not a shout.
The numbers I trust are simple. Off-axis rejection matters more than frequency response for a home podcaster with a noisy street outside. A mic that picks up the fan in the next room is not a bargain at any price. A microphone you are afraid to use is worse than a worse microphone you use every day.
The two mics I would start with
You do not need a locker of microphones. You need one mic that fits your room and your patience level. Here are the two I would put at the top of a first list, one for the plug and play path and one for the noisy room path.
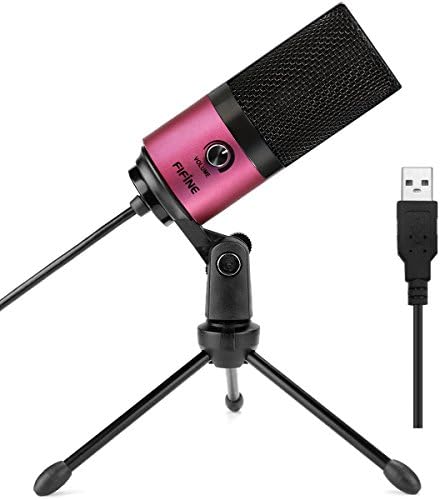
Budget pick: FIFINE K669B USB Microphone, Condenser Recording Mic for Vocals, Meeting
 Visit on Amazon →
The FIFINE K669B is the mic I hand to people who want to start recording tonight and do not want to buy an interface. It is a USB condenser, so it plugs straight into your computer and works for vocals and meetings without a driver install. For a solo podcaster, a voiceover beginner, or anyone recording a first season, it removes the entire interface question from the table.
The trade is that a condenser hears more of the room. In my kitchen test, the FIFINE picked up the refrigerator cycle and a little tile reflection. That is not a flaw in the mic. That is physics. A condenser is more sensitive, and sensitivity is exactly what you do not want when your recording space is untreated.
Where it wins is simplicity. You plug it in, set your gain in the operating system or your recording app, and you are recording. If your room is quiet and you can get close to the mic, this is the fastest path to a usable file. If your room is loud, read the next section before you buy.
Flaws but not dealbreakers: The desk stand transmits typing and mouse clicks. Put it on a boom arm or a shock mount before you blame the mic. The USB connection also means you are stuck with the built-in converter, which is fine for a first setup but not a forever path if you later want a dynamic mic and an interface.
Anyone recording in a quiet bedroom or a treated corner who wants zero setup friction should start here.
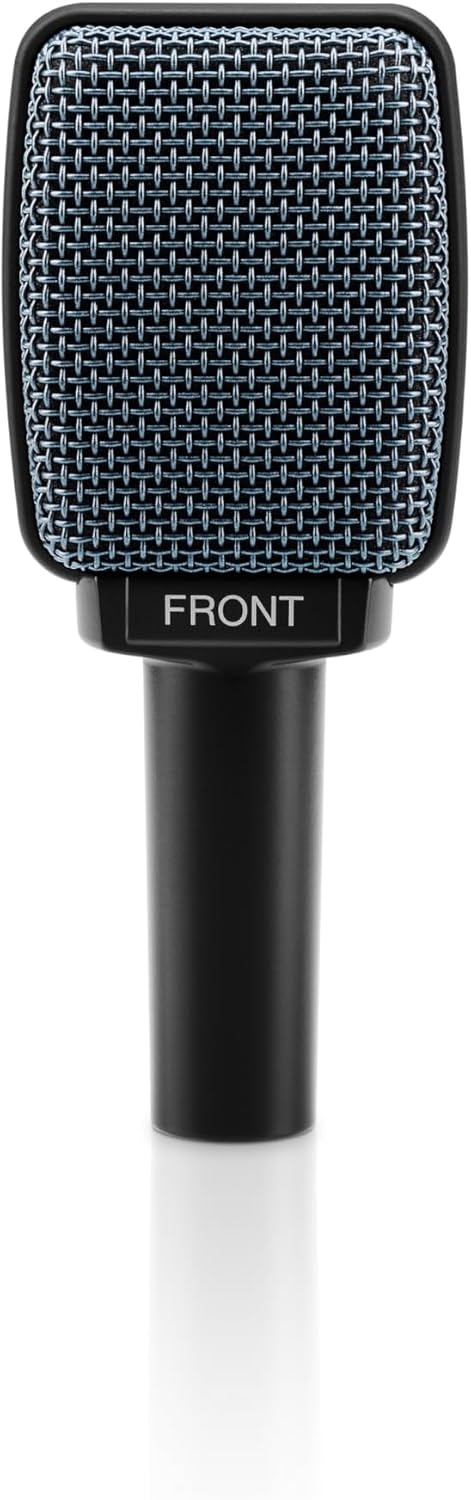
Dynamic upgrade pick: Sennheiser Pro Audio E906 Microphone, black
 Visit on Amazon →
The Sennheiser E906 is a dynamic supercardioid microphone. I am a voice guy, so I am not going to review it as a guitar cab mic. For podcasting, its value is off-axis rejection. It ignores more of the room than a condenser will, which is the single biggest upgrade you can make when your recording space has a street, a fan, or a roommate.
In my untreated kitchen, the E906 was the mic that made the refrigerator disappear from the background. It also handled plosives better than the condenser without a pop filter, though I still use one. The catch is gain. A dynamic mic needs more clean gain than a USB condenser, and that means you need an interface or a mixer you already own. If you do not have one, this is not the first mic to buy.
The E906 is also not a plug and play USB mic. It is XLR, it is built for stage and studio work, and it rewards good gain staging. If you already own an interface and you record in a real life room, it is the more forgiving tool. If you do not, the FIFINE above is the honest starting point.
Flaws but not dealbreakers: It needs an interface, and it costs several times more than the budget USB option. It also has a tighter pickup pattern, which means you have to stay on axis. Move your head too far and the tone changes. That is the price of rejection.
Anyone with an untreated room, a noisy street, or a loud voice who already owns an interface should look here first.
The actual setup workflow
Now the part you came for. This works with either mic, and it matters more than the mic choice.
Step one: Pick the mic for your room, not for the spec sheet. If your room has street noise, a fan, or a fridge hum, start with a dynamic. If your room is quiet and you can get close to the mic, a USB condenser like the FIFINE is the faster path. The best mic is the one that fits the noise floor you actually have.
Step two: Get the mic off the desk. A desk stand transmits typing, mouse clicks, and HVAC rumble straight into the recording. A boom arm and a shock mount matter more than the mic upgrade. I have heard a $300 mic ruined by a $15 desk stand. Fix the mount before you fix the mic.
Step three: Use distance and the proximity effect on purpose. Start four to six inches from the grille, slightly off axis so you are not speaking straight into the capsule. As you get closer, the proximity effect boosts low end. That can sound warm and broadcast-like, or it can sound muddy. Move back an inch if your voice gets boomy.
Step four: Set gain staging before you record a full take. Speak your loudest line and set gain so the peaks land around -12 to -6 dBFS. Not at 0. Not clipping. Leave headroom for the laugh, the cough, or the moment you get excited. If you set gain on a normal sentence, your loudest moment will clip.
Step five: Treat the noise you can control. Close the window. Turn off the fan. Move the mic away from the laptop. Hang a blanket behind you, not in front of you. Record in a closet if it sounds better. Foam panels help with reflections, but they do not stop a leaf blower. Do the free fixes first.
Step six: Add a pop filter and a boom arm before you upgrade the mic. Plosives are a technique problem and a gear problem. A pop filter is cheaper than a new microphone. A boom arm gets the mic off the desk and into the right position. These two accessories change more recordings than a mic swap.
Step seven: Record 30 seconds of room tone. Sit in silence and record. Use that room tone in editing to fill gaps and smooth cuts. It also tells you your noise floor. If the room tone sounds like a highway, no microphone is going to save the take.
Step eight: Listen on headphones, not speakers. Listen for plosives, mouth noise, room ring, and keyboard thumps. Re-record only if the performance is bad, not if the room tone is fixable in the edit. Headphones reveal problems that laptop speakers hide.
Step nine: Edit for the room, not against it. High-pass filter the rumble. Use gentle noise reduction, not a heavy gate. De-ess and de-plosive by hand where it matters. Over-processing makes a home recording sound like a home recording with a robot in the room.
What actually makes the difference
Off-axis rejection is the spec that matters most for a home podcaster. A mic that ignores the room lets you record in a normal apartment. A mic that hears everything makes you build a studio before you can publish an episode.
Room tone is the second thing. Every room has a sound. The goal is not silence. The goal is a steady, low noise floor that disappears under your voice. If your room tone pulses or hums, fix that before you buy anything else.
The third thing is gain staging. A dynamic mic with poor gain sounds worse than a USB condenser with good gain. Set your levels, leave headroom, and do not normalize a clipped file. Clipping is not a style.
I do not trust spec sheets that brag about frequency response nobody can hear. I trust a spectrogram, a pair of headphones, and a second listen the next morning. If a mic makes you want to record again, it is the right mic.
What this all costs
The FIFINE K669B sits at the entry end of the market. Check current Amazon price. The Sennheiser E906 costs several times more, and if you do not already own an interface, you have to add that to the budget. Check current Amazon price on both before you decide.
The math changes depending on what you already own. If you have a computer and a quiet room, the FIFINE is the lowest friction path. If you have an interface and a noisy room, the E906 is the more useful tool. If you have neither, buy the USB mic first and spend the difference on a boom arm, a pop filter, and a moving blanket.
The upgrade treadmill is real. You do not need a new mic every time an episode sounds bad. Most of the time, the problem is the room, the distance, or the gain. Fix those first, then decide if the mic is actually the weak link.
The bottom line
A podcast mic setup in an untreated room is not about buying the most expensive microphone. It is about matching the mic to the room, getting it close to your mouth, setting gain staging with headroom, and treating the noise you can control. The FIFINE K669B is the simple USB starting point. The Sennheiser E906 is the dynamic upgrade for a noisy room, if you already have an interface.
Buy the mic that fits your actual space. Use it every week. Treat the room when you can. Your listeners will never know the model number, but they will know whether the recording sounds like a person talking to them or a person talking in a kitchen.