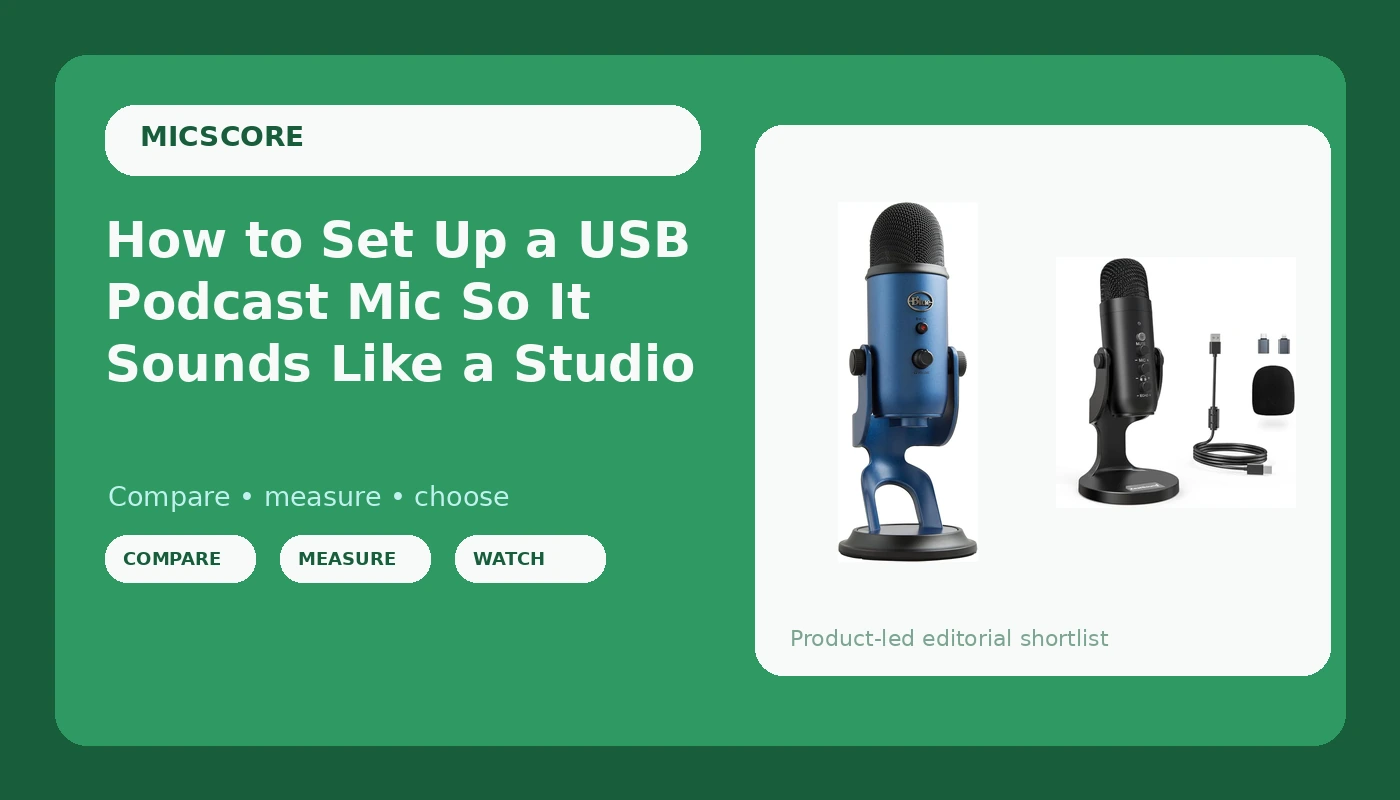
Most USB podcast microphone setup advice starts with the software. That is backwards. I have edited north of 4,000 episodes for other people, and the episodes that sound bad almost never sound bad because of the microphone. They sound bad because there is a refrigerator humming two feet away, because the mic is sitting on the same desk as a mechanical keyboard, and because the gain is cranked up to compensate for a mouth that is eight inches from the capsule.
Here is the honest version of how this goes. A USB podcast microphone setup that survives a real edit takes about an hour, costs nothing beyond the mic itself, and does not require an interface, a mixer, or a treated room you have to build. It requires you to decide where the mic points, how hot you run it, and what the room sounds like when you stop talking.
So I am going to do this in the order that matters. The room first. Then the two USB mics I actually hand to new podcasters. Then the exact setup sequence I use in my own studio and in my untreated kitchen, because most of you record in a room like my kitchen and not a room like my studio.
Why you should trust me
I am a podcast editor and audio engineer in Brooklyn. I have edited more than 4,000 episodes for other people, which means I have heard every microphone mistake a human being can make, usually twice, usually at 11 p.m. the night before a client's release day. I run a small studio where I record voiceover and teach podcasters how to sound good, and I have put 30+ mics through the same test.
That test happens in two rooms. One is my treated home studio. The other is my untreated kitchen, which has a refrigerator, a tile floor, and a window over a street with buses on it. I keep spectrograms of every mic in both rooms, because the kitchen is the room most podcasters actually record in, and a mic that only sounds good in a treated studio is not useful information for you.
My bias, stated up front: the room is the microphone. I can make a cheap mic sound better than an expensive one in a good room, and I can make the expensive one sound worse in a bad room. I would rather you spend your first hour on placement and gain than your first dollar on an upgrade.
How I picked these two mics and how I tested them
The short list below is not a list of the best microphones on earth. It is a list of USB mics that clear four specific bars, because those four bars are what separate a mic you can finish an episode with from a mic that fights you.
Bar one: a real gain control on the mic body, not a slider buried in a control panel. Bar two: a headphone jack with zero-latency monitoring, so you can hear yourself while you talk. Bar three: it mounts on a boom arm without an adapter scavenger hunt. Bar four: it works on the computer you already own, with no driver ritual.
Both of the mics here are condensers, and I want to be straight with you about that, because my usual advice for a noisy apartment is a dynamic mic. Condensers are more sensitive and they hear more of the room. That does not make them unusable. It makes placement and gain staging non-negotiable, and that is what the rest of this article is about. In my kitchen, both of these mics recorded usable voice once I pointed them away from the fridge and dropped the gain. Neither one recorded usable voice with the mic on the desk stand and the gain at noon.
I compared them on the same boom arm, in the same spot, at the same distance from my mouth, with the same 30 seconds of room tone recorded before each take. The room tone is the tell. If the silence between your sentences sounds like a fan, no amount of EQ in post is going to fix it, and I am the guy who has to try.
The two USB mics worth starting with
These are the two I hand people, and they are different tools for different rooms and different temperaments. One gives you options and a software layer. One gives you knobs on the body and no homework.
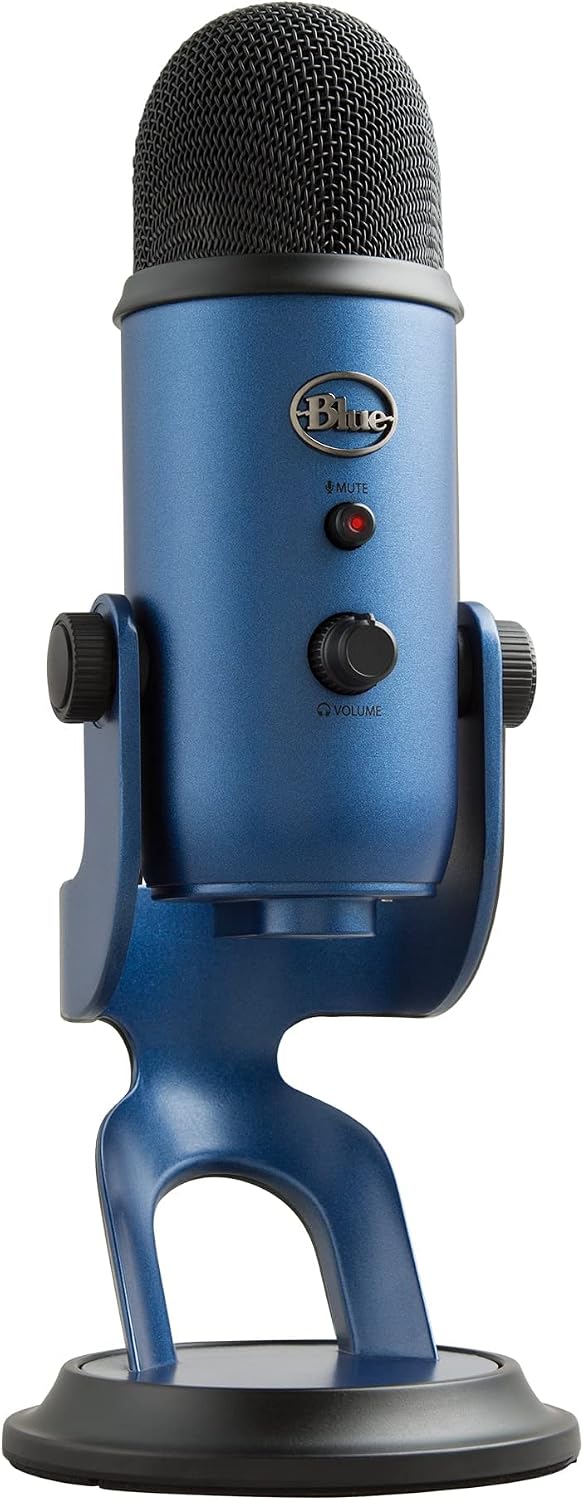
Our pick: Logitech Creators Blue Yeti USB Microphone, Midnight Blue
 Visit on Amazon →
This is the one I put in front of a new podcaster who wants to learn, because it teaches you things. It has four pickup patterns, a built-in gain control, a headphone jack for zero-latency monitoring, and the Blue VO!CE effects layer if you want to shape the sound on the way in. It is plug and play on PC and Mac. Check current Amazon price.
The four patterns are the reason I like it as a teaching mic. Cardioid is the one you will use for solo episodes, and it is the one that rejects the most off-axis noise. Figure-eight and omni are for interviews and group recording, and stereo is for instruments, which is outside what I do. My advice to a solo podcaster: set it to cardioid and leave it there. Every other pattern is a way to invite your HVAC system onto the show.
Flaws but not dealbreakers: It is a side-address condenser, which means you talk into the side with the logo, not the top. People talk into the top of it constantly, and then they wonder why they sound like they are broadcasting from a well. It is also heavy, so a flimsy desk stand will sag and a cheap arm will droop after a month. Budget for a real boom arm. And because it is a condenser, it hears the room. If your room is loud, you are going to work for this mic.
Anyone who wants one mic that can do solo episodes, two-person interviews, and the occasional instrument, and who is willing to learn what the patterns do, should start here.
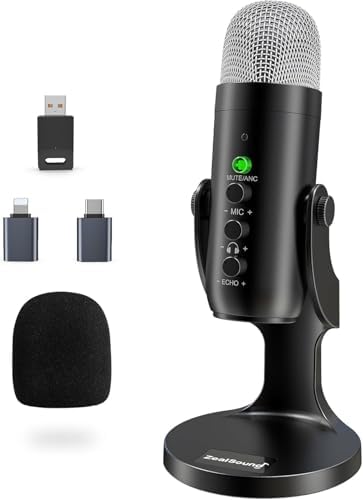
Budget pick: ZealSound Podcast Microphone for PC, Noise Cancellation USB Mic
 Visit on Amazon →
This is the one I hand people who do not want a software layer, do not want to read a manual, and want the controls where their hand already is. Gain adjustment, volume adjustment, a mute button, monitoring, and an echo control all live on the mic body. It works with PC, Mac, iPhone, iPad, and Android, which matters if you are recording to a phone. Check current Amazon price.
The mute button is the feature I care about most, and I care about it for a reason that has nothing to do with audio quality. A microphone you are afraid to use is worse than a worse microphone you use every day. If you can hit mute with one finger instead of reaching for a mouse, you will actually use it, and your editor will not have to cut out the part where you cough into a live mic.
Flaws but not dealbreakers: The echo control is a gimmick. Leave it off. It adds a slap that sounds like a bathroom and cannot be removed in post. The noise cancellation is a processing layer, and processing layers that claim to remove noise also remove parts of your voice, usually the chest and warmth in the low end. Turn it off, fix the room instead, and you will keep your voice intact. It is still a condenser with a wide pickup, so the same room rules apply.
Anyone recording to a phone or a laptop who wants the knobs on the mic and no setup ritual should look at this one first.
Fix the room before you fix the mic
Do this before you plug anything in. It takes 15 minutes and it is worth more than the next mic you were thinking about buying.
Find the noise. Sit where you record. Stop talking. Listen for 60 seconds. Fridge, HVAC, a laptop fan, a street, a neighbor, a fluorescent ballast. Write down what you heard. Now record 30 seconds of silence with your phone or the mic, put on headphones, and listen to that file at a normal volume. That is your room tone. It is the floor your entire episode sits on.
Kill what you can. If the fridge is on the same circuit, unplug it for the session or move the recording spot. If the HVAC vent is above your desk, move the desk. If the street is the problem, point the mic away from the window and treat that side of the room. Off-axis rejection matters more than frequency response for a home podcaster with a noisy street outside, and pointing the back of the mic at the noise is free.
Soften the room. You do not need foam panels. You need soft stuff behind and around your head: a rug if the floor is hard, a couch, a bed, a bookshelf, a closet full of coats. Recording in a closet with the door open is not a joke, it is a legitimate room treatment strategy that has saved more podcasts than any plugin. Curtains on the window. A blanket behind you. Anything that stops sound from bouncing off a flat hard surface and landing back in the capsule.
Get the mic off the desk. A desk stand transmits every keystroke, mouse click, and pen tap straight into the mic through the furniture. A boom arm gets the mic off the surface and puts it in front of your face, where it belongs. In my experience, this single change is worth more than a mic upgrade, and I have heard a good mic ruined by a bad stand more times than I can count.
The setup workflow, in order
Step one: mount and position. Clamp the boom arm to the back or side of the desk, not the front edge where your wrists land. Bring the arm in from the side so the mic approaches your mouth at an angle rather than head-on. For a side-address mic, the capsule faces the side of the mic body, so you angle the front of the capsule toward your mouth, roughly 15 to 30 degrees off axis. That angle is what keeps plosives off the capsule.
Step two: distance. Four to six inches from your mouth, slightly off to one side of your nose so you are not breathing directly into it. Closer than that and you get proximity effect, which is the bass boost you hear when a voice gets chesty and boomy. Farther than that and you turn up the gain, which turns up the room. Four to six inches with a modest gain setting beats 12 inches with a hot gain setting every single time.
Step three: the pop filter. Get one. A pop filter, or even a foam windscreen, is the difference between a clean plosive and a thump that your editor has to manually draw out. This is the cheapest fix in audio and the one people skip most often.
Step four: pattern. If your mic has patterns, set cardioid. Cardioid is the most directional of the common patterns, which means it rejects the most of what is behind and beside the mic. That is your refrigerator, your street, and your partner's phone call. Set cardioid, leave it, and stop fiddling.
Step five: gain staging. This is the part that decides whether your recording is usable. Set your mic gain so your normal speaking voice peaks somewhere around -12 dBFS and averages around -18 dBFS in your recording software. Watch the meter while you talk at your normal volume, not your podcast voice, not a whisper, not a shout. If you have to lean in to get a level, the gain is too low. If the meter is bouncing off the top, the gain is too high and you are clipping, which is unrecoverable.
Step six: monitor. Put on closed-back headphones and listen to yourself through the mic while you record. This is where a headphone jack on the mic earns its keep, because zero-latency monitoring means you hear yourself in real time instead of half a second later. Hearing yourself is uncomfortable for about two days and then it becomes the most useful habit you have, because you catch the plosive, the chair creak, and the room tone while you can still do something about it.
Step seven: record a test and listen back. Talk for 60 seconds about nothing. Stop. Record 30 seconds of silence. Then listen to both on headphones, all the way through, at a normal volume. If the silence sounds like a room with a fan in it, go back to the room section. If the speech sounds thin and distant, you are too far away. If it sounds boomy and muffled, you are too close or talking into the wrong side of a side-address mic. Fix it now, not in post.
Step eight: leave the software alone. If your mic has an effects layer, use it for a gentle high-pass filter to cut rumble below your voice, and stop there. Compression and EQ are for the edit, where you can undo them. The Blue VO!CE effects on the Logitech mic are genuinely useful, and they are also easy to overdo on the way in. The ZealSound's on-body controls are convenient, and the echo is not your friend. Get a clean, dry, well-leveled recording and you can do anything with it later.
Mistakes that ruin an otherwise fine recording
Talking into the top of a side-address mic instead of the side. This is the number one mistake with the Logitech mic and it makes every recording sound like a voice memo from a hallway.
Cranking gain instead of moving closer. More gain means more room, more fan, more street. Move your mouth, not the knob.
Leaving the mic on a desk stand. You will hear every keystroke. Your editor will hear every keystroke. Everyone hears the keystrokes.
Recording in omni or stereo in a bad room. Those patterns are for interviews and instruments. In an untreated room they are a room-tone delivery system.
Monitoring through speakers. The mic hears the speakers, and now your recording has a ghost of itself in it. Headphones, always.
Judging the mic before you have fixed the room. I have watched people buy three mics in a year while recording next to a running refrigerator. The mic was never the problem.
What this actually costs you
Both mics sit in the same entry band, and neither one is the expensive part of this setup. Check current Amazon price on each and compare against what you would spend on a boom arm and a pop filter, because the arm and the filter will improve your recording more than the difference between these two mics will.
The real cost is an hour. Fifteen minutes on the room, ten minutes on placement and gain, and the rest spent listening back to your own voice, which is the least pleasant and most valuable part of the whole job. Do that once and you have a setup you can repeat every single week without thinking about it.
And here is the part I mean: if you set the mic up right, you stop thinking about the mic. You stop watching gear videos. You stop wondering whether the next one would fix it. You just hit record, and the room, the gain, and the position do their job quietly in the background while you do yours.
That is the whole trick. Your mic was built to do this. Let it.